
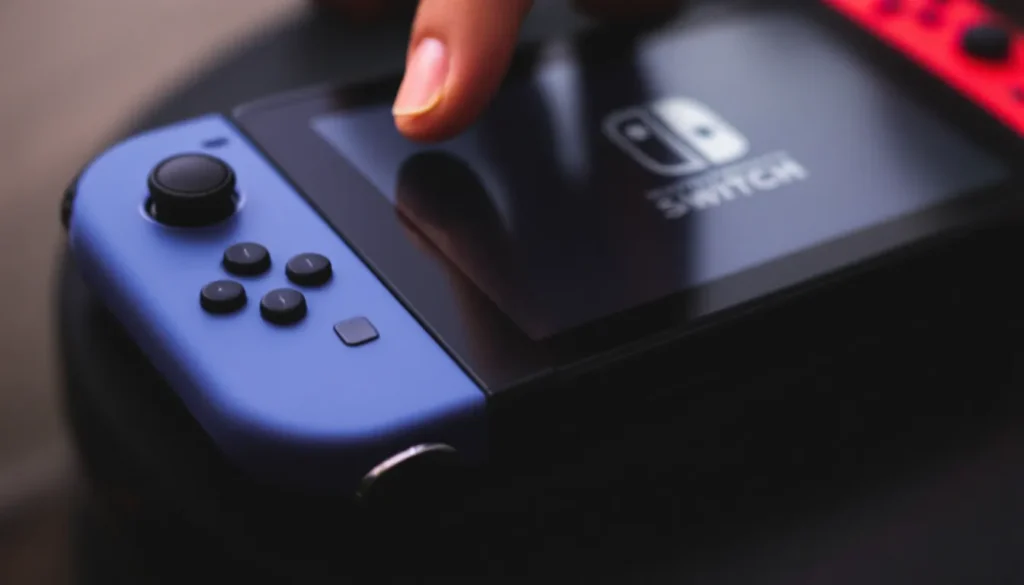
Your Nintendo Switch won’t turn on, and you’re staring at a completely black screen. It happens more often than you’d think, whether your console has been sitting in a drawer or gets daily play, power issues can strike without warning. The good news? Most of the time, your Switch isn’t dead for good. Before you panic or assume you need a replacement, there’s a solid chance one of these troubleshooting steps will bring it back to life. This guide walks you through 11 proven fixes to diagnose and resolve why your Nintendo Switch won’t turn on, starting with the simplest checks and escalating to more advanced solutions.
Key Takeaways
- A Nintendo Switch won’t turn on most often due to simple fixes like inadequate charging time, dock issues, or a hard reset—not permanent hardware failure.
- Perform a hard reset by holding the power button for 12-15 seconds to force a shutdown and clear software glitches that prevent startup.
- Charge your Switch for at least 30-60 minutes directly via USB-C if the battery is completely depleted, as deeply drained batteries show zero signs of life initially.
- Test your dock separately by charging directly through the USB-C port; if the console powers on this way, a faulty dock is the culprit and should be replaced.
- Clean the USB-C charging port, metal back contacts, and Joy-Con connections gently with a dry cloth or compressed air to remove debris and oxidation blocking power delivery.
- Use Recovery Mode to repair corrupted software and attempt console initialization without losing data if basic troubleshooting fails.
- Seek professional repair only if your Switch shows zero response after 3+ hours of charging and multiple attempts, or if it powers on but immediately shuts down or overheats.
Check the Basics Before Troubleshooting
Before diving into complex fixes, nail down the fundamentals. A surprising number of “dead” Switches actually have straightforward issues that take seconds to address.
Inspect the Power Button and Dock Connection
Start by looking at the physical power button on the left side of the console. Press it firmly and hold it for 3-5 seconds, you’re looking for any sign of response: a vibration, a screen flicker, or the startup chime. Sometimes the button gets stuck or requires a harder press than usual.
If your Switch is docked, check the connection points. The metal contacts on the back of the console should align cleanly with the dock’s charging pins. Look for any visible debris, corrosion, or misalignment. Even a slightly crooked dock can prevent power detection. Try undocking the console and examining both the dock and the Switch’s back panel.
Verify Your Power Source and Cable
Your dock needs juice to charge your Switch. Confirm that the power adapter is plugged into a working wall outlet, try plugging in another device to verify the outlet itself works. Check the cable connection where it meets the dock: it should be firmly seated with no wiggle room.
The USB-C charging cable deserves a close look too. Follow it from the power brick to the dock, checking for any visible damage, kinks, or fraying. If you notice physical damage to the cable, that’s your culprit. A bent or broken cable won’t deliver power even if everything else is fine.
Force a Shutdown and Restart
Sometimes your Switch just needs a hard reset to clear whatever’s causing the lockup. This is one of the most effective troubleshooting steps because it forces the system to shut down completely and restart from scratch.
How to Perform a Hard Reset
Locate the power button on the left side of the console. Hold it down for a full 12-15 seconds, longer than a normal press. You’re aiming for a forced shutdown here, not a quick sleep mode. Don’t stop after 3-5 seconds: you need to push through and hold. After the full 12-15 seconds, release the button and wait 5 seconds.
Now press the power button once as you normally would to power on the console. This time, the system should respond with the startup screen. The Switch uses this hard reset to clear temporary files and reset the boot process, often fixing why won’t my Nintendo Switch turn on issues caused by software glitches.
What to Expect During Recovery
After a hard reset, the console might take a few extra seconds to boot up compared to normal startup. This is completely normal, the system is checking its internal storage and initializing fresh. You might see the Nintendo logo, a brief black screen, and then the home menu. Occasionally, it’ll take 10-15 seconds total from the moment you press power to when you see the home screen.
If the console still doesn’t respond after this process, move on to the next fix. If it does power on, great, you’ve solved your problem. But, if it powers on but immediately shuts down or acts unstable, battery charge is likely the issue.
Charge Your Switch Properly
A dead or deeply depleted battery is the leading cause of why your Nintendo Switch is not turning on. The Switch’s battery can drain completely, especially if the console has been off for weeks or months.
Understanding Low Battery Scenarios
When the internal battery is completely depleted, the Switch won’t respond to button presses or show any signs of life, no LED indicator, no screen response, nothing. This isn’t a hardware failure: the system simply has no power to boot. Leave your Switch charging for at least 30 minutes to 1 hour before expecting any response. Some users have waited 2-3 hours for a completely dead battery to hold enough charge to power on.
During this charging period, you might not see any visual feedback. No LED light, no startup screen, just patience. This is normal for deeply discharged batteries. The charging circuit needs time to trickle-charge the battery back to a safe operating level before the full system can boot.
Using Alternative Charging Methods
If your dock isn’t working, try a USB-C power adapter directly on the console. Nintendo’s official USB-C power adapter (15V/2.6A) is ideal, but any quality USB-C charger rated for at least 5V/1.5A will work in a pinch. Direct charging bypasses the dock entirely, which is useful if you suspect a dock problem.
Connect the USB-C cable to the bottom of the Switch (the port on the bottom center) and plug the adapter into a wall outlet. Again, wait 30-60 minutes minimum. Some third-party chargers work fine, but avoid cheap knock-offs that don’t have proper voltage regulation, they can cause more damage. Once you’ve given it sufficient charging time, try pressing the power button. Many reportedly “broken” Switches come back to life this way.
Update Your System Software
Occasionally, a failed software update or corrupted boot files can prevent your Switch from starting. System updates are critical for stability, and if one went wrong, your console might refuse to turn on. The good news is you can usually recover without losing your data.
Updating in Dock Mode
If your Switch is responsive but stuck on a startup screen or frozen, ensure it’s properly docked and connected to WiFi. Go to System Settings > System > System Update and check for available updates. Your Switch needs an active internet connection for this, ideally a 2.4 GHz WiFi network for stability.
Let the update process complete fully without interrupting it. Even if it takes 10-20 minutes, don’t unplug the dock or remove the console. A interrupted system update can actually make things worse.
Manual Update via Micro SD Card
If your Switch won’t boot enough to access system settings, you can perform a manual update using a microSD card and a PC or Mac. Visit the Nintendo Switch support page for the current update file. Copy the update file to your microSD card following Nintendo’s exact file structure, then insert the card into your Switch and power it on.
The console will detect the update file and install it automatically. This method bypasses any corrupted boot system and gives your Switch a clean slate. It requires some technical comfort with file transfers, but it’s worth trying before assuming hardware failure.
Test and Replace the Dock
The dock is often the culprit when your Switch won’t turn on. Power delivery happens through the dock connection, so a faulty dock prevents charging and can block startup. Testing and potentially replacing it is a straightforward fix.
Diagnosing Dock-Related Issues
First, power your Switch via the USB-C port directly (not through the dock). Use a USB-C power adapter and cable connected straight to the bottom of the console. If the Switch powers on this way, your dock is the problem. The issue could be a damaged USB-C connection inside the dock, a failed power delivery circuit, or internal corrosion on the dock’s charging pins.
Inspect the dock’s interior. Look at the metal contacts where the Switch sits, they should be clean and shiny, without green corrosion or white mineral buildup. If you see corrosion, the dock has had water exposure and is likely unfixable. Hold the dock up to a light and look for any cracks in the plastic or circuit board inside.
When to Consider a Replacement
If direct USB-C charging works but dock charging doesn’t, replace the dock. Official Nintendo docks cost around $40-50 and are worth the investment for reliable charging. Avoid cheap third-party docks, they’re often why your Switch won’t turn on in the first place due to voltage regulation issues.
Before buying a replacement, try cleaning the dock’s charging contacts with a soft, dry cloth and the Switch’s back metal contacts with a pencil eraser. Sometimes debris buildup mimics a failed dock. After cleaning, attempt docking and charging again. If still no luck after 30 minutes, a replacement dock is your next move.
Resolve Hardware and Connection Problems
Beyond the dock, hardware connections inside and around your Switch can prevent startup. Joy-Con connections and charging port debris are frequent offenders.
Clean Charging Ports and Contacts
The USB-C port on the bottom of your Switch accumulates dust, lint, and debris over time, especially if you carry it in a backpack or keep it on a shelf. Use a small flashlight to peer into the USB-C port and see if visible debris is blocking the connection. Never jam anything metallic into the port (a toothpick or paperclip risks short-circuiting it), but a wooden toothpick, used very gently, can dislodge trapped lint.
Alternatively, use compressed air in short bursts to blow out the port. Hold the can upright and use the straw attachment, aiming into the port from different angles. This is the safest method and usually effective. If the port is truly clogged, it might need professional cleaning.
Meanwhile, clean the metal contacts on the back of your console where it docks. Use a dry microfiber cloth or pencil eraser to gently wipe the four metal contact points. These are critical for power delivery, and oxidation or fingerprint oils can block connection. Do the same for the dock’s charging pins.
Inspect Joy-Con Connections
Your Joy-Con controllers connect to the console’s sides via small metal contacts and a rail system. If these connections are faulty, the Switch sometimes won’t boot properly because it detects a hardware error. Detach both Joy-Cons by pushing up on the small release tabs on the back of each controller.
With the Joy-Cons removed, examine the metal contacts on the inside of each controller and the rails on the sides of the Switch. Look for corrosion, debris, or bent pins. Clean these contacts gently with a dry cloth as well. Reattach the Joy-Cons firmly, you should hear a satisfying click. If one Joy-Con was defective, this might resolve the startup issue.
Try Recovery Mode
Recovery Mode is your console’s built-in diagnostic tool. It allows you to initiate repairs and reset operations that you can’t access from the normal boot sequence. This is deeper troubleshooting than a simple hard reset.
Entering Recovery Mode Safely
To enter Recovery Mode, power off your Switch completely. Then, hold down the Power button and the Volume Up button simultaneously for about 10-15 seconds. You’re not just doing a quick press, hold both buttons down together until you see a recovery menu appear on the screen. This menu looks different from the normal Nintendo home screen: it’s a text-based interface with options.
The first time you access Recovery Mode, it can be intimidating. Don’t panic. You’ll see options including “Repair Console” and “Initialize Console without Formatting.” Stay calm and choose the appropriate option based on your situation.
Troubleshooting from Recovery
Select “Repair Console” first. This option attempts to fix corrupted software without erasing your games or save data. The process takes 10-30 minutes depending on your console’s storage. During this time, do not unplug or remove the console from the dock. The system will reboot several times, this is normal.
If “Repair Console” doesn’t work, you may need to initialize without formatting, which also preserves your data. As a last resort, “Initialize Console” with formatting erases everything but gives you a completely fresh software state. Choose this only after other methods fail, since you’ll lose game downloads (though your saved data can sometimes be restored via cloud backup if you’re subscribed to Nintendo Switch Online).
After Recovery Mode completes, your Switch should power on normally. Many consoles that won’t respond to anything else come back to life through Recovery Mode.
When to Seek Professional Repair
If you’ve worked through all the steps above and your Switch still won’t turn on, you’re likely dealing with a hardware failure that requires professional expertise. Knowing when to give up and seek help saves you time and prevents accidental damage.
Identifying Unrepairable Hardware Failures
If the console shows zero signs of life, no LED indicator light, no response to power button, no vibration, no charging indicator, even after 3+ hours of charging and multiple hard resets, you’re dealing with either a failed power delivery circuit or a dead battery that can’t be revived. These aren’t DIY fixes. The power management board inside your Switch has likely failed, or the internal battery is damaged beyond recovery.
Similarly, if your Switch powers on but immediately powers off, or if it gets extremely hot during charging, stop attempting fixes immediately. Continued experimentation with a malfunctioning power system can cause fires or permanent damage. Heat indicates a short circuit or failed charging circuit, professional hands only.
Water damage also falls into this category. If your Switch was exposed to moisture and won’t power on, the corrosion has likely spread to critical components. While some water damage can be repaired by professionals who can dry out and clean the circuit boards, it’s beyond home troubleshooting.
Warranty and Support Options
Nintendo’s limited warranty covers hardware defects for one year from purchase. If your Switch is within that window, you’re eligible for free repair or replacement. Contact Nintendo’s official support with your serial number and date of purchase. They’ll guide you through submitting your console for repair. Turnaround is typically 2-4 weeks.
Out of warranty? Nintendo offers paid repair services for around $110-130 depending on the issue. Third-party repair shops like iFixit and local gaming repair stores often charge less ($60-100) and complete repairs faster. But, third-party repair voids any remaining warranty. Weigh cost versus convenience, and always back up your save data if possible before shipping your console anywhere.
You can also explore gaming hardware retailers for warranty extension plans or protection plans if your Switch is still relatively new. Some retailers offer accidental damage coverage for a small monthly fee, worth considering if you’ve had multiple issues.
Prevention Tips for Future Issues
Once you’ve revived your Switch, protect it from future power issues. Most startup failures are preventable with proper care and habits.
Best Practices for Console Care
Keep your Switch away from extreme temperatures. Heat accelerates battery degradation, and cold prevents batteries from delivering power efficiently. Never leave your console in a hot car, direct sunlight, or near radiators. Ideal operating temperature is 50-95°F (10-35°C). Cold storage (below 50°F) is fine for short periods, but let the console warm to room temperature before powering it on to avoid internal condensation.
Charge your Switch regularly, even if you’re not using it. Lithium batteries (like the one in your Switch) degrade faster if left completely drained. Ideally, keep your console between 20-80% charge. If you’re not playing for weeks, charge it to 50% before storing it. This maximizes battery lifespan and prevents the complete discharge scenario that makes revival difficult.
Use only official Nintendo charging accessories or certified third-party chargers. Cheap USB-C power adapters often have poor voltage regulation, which damages the battery and charging circuit over time. The small upfront savings aren’t worth replacing your entire console. Original Nintendo adapters are $20-30: replacements save your system.
Avoiding Common Damage Scenarios
Never submerge your Switch in water, and be cautious around liquids. The console isn’t waterproof, even brief exposure to water can corrode circuit boards. If you spill liquid on your Switch, power it off immediately, don’t attempt to charge it, and let it air dry for 24-48 hours in a cool, dry place. Don’t use a hairdryer (heat causes more damage) or put it in rice (moisture doesn’t help electronics). After drying, try powering it on carefully.
Protect the charging port from debris. Use a cable organizer to keep the USB-C port clear of dust and lint. Consider a protective case with port covers if you travel frequently. A blocked port forces the system to work harder to charge, generating heat and stressing the power delivery circuit.
Avoid dropping your Switch or subjecting it to impact. The internal components are delicate, and a hard fall can disconnect the battery or damage the power board. If you’ve dropped your Switch and it immediately won’t turn on, physical damage is likely the cause, professional repair is your option.
Finally, keep your Switch’s software up to date. Recent Nintendo Switch announcements and system updates include stability improvements and bug fixes that prevent many startup issues. Enable automatic updates in System Settings so you’re always running the latest stable software.
Conclusion
A Nintendo Switch that won’t turn on feels like a disaster, but it’s usually fixable. Most of the time, the solution falls into one of these categories: inadequate charging time, a simple hard reset, dock failure, or software corruption. You’ve got everything you need here to diagnose and fix the problem yourself in about 90% of cases.
Start with the basics, verify power, charge for an hour, perform a hard reset. If that doesn’t work, test your dock separately, clean your charging ports, and try Recovery Mode. Only after exhausting these steps should you consider professional repair or replacement.
Once your Switch is back in action, carry out the prevention tips to avoid this frustration again. Your console will thank you with years of reliable gaming.